
Instructions for Making a Face Mask
Printable PDF:
Click the image below to download
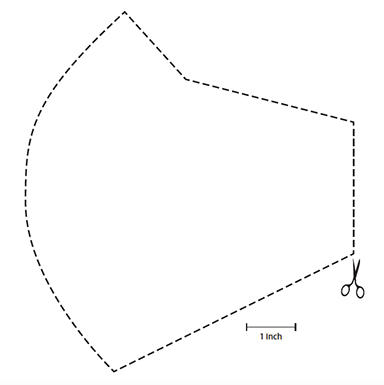
Mask Pattern
If using your own fabric, choose a medium weight 100% cotton weave for the exterior of the mask, and a medium-weight 100% cotton knit for the interior. A yard of cotton weave and a 1/3 of a yard of cotton knit will make 8 masks. For each mask, you’ll need two 1.5” x 30” strips of cotton weave for the ties.
Step 1
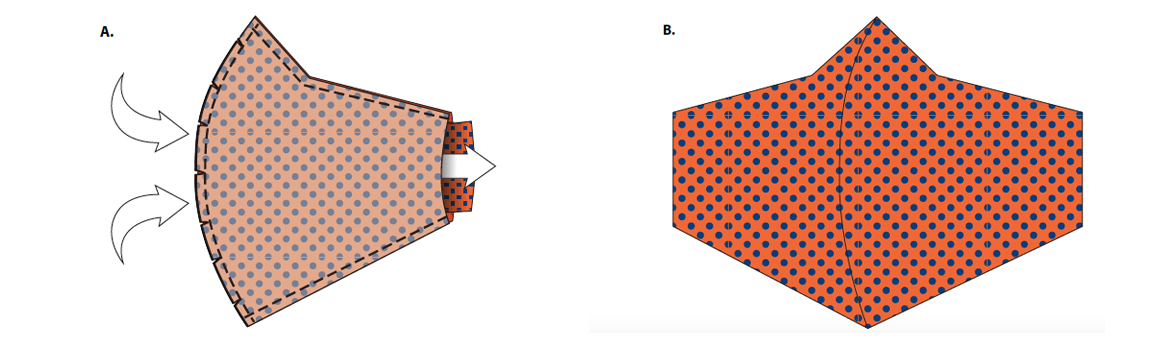
Trace the pattern onto the backside of both the exterior and interior fabric. Flip the pattern over so that you have 2 pieces of each fabric that are mirrors of one another.
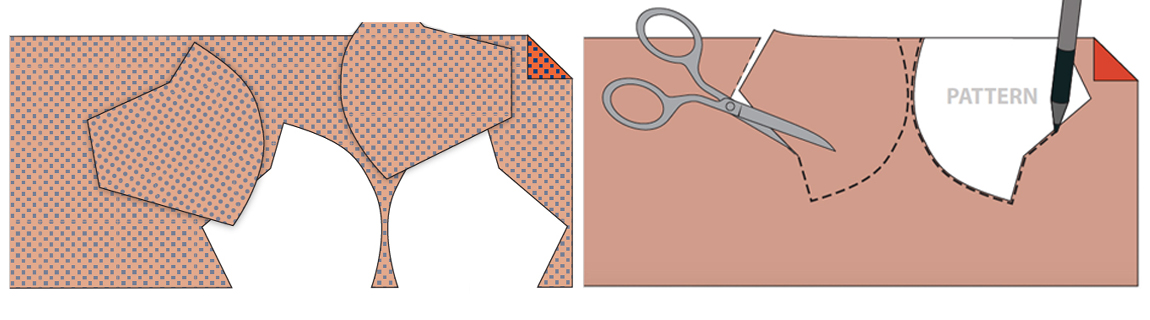
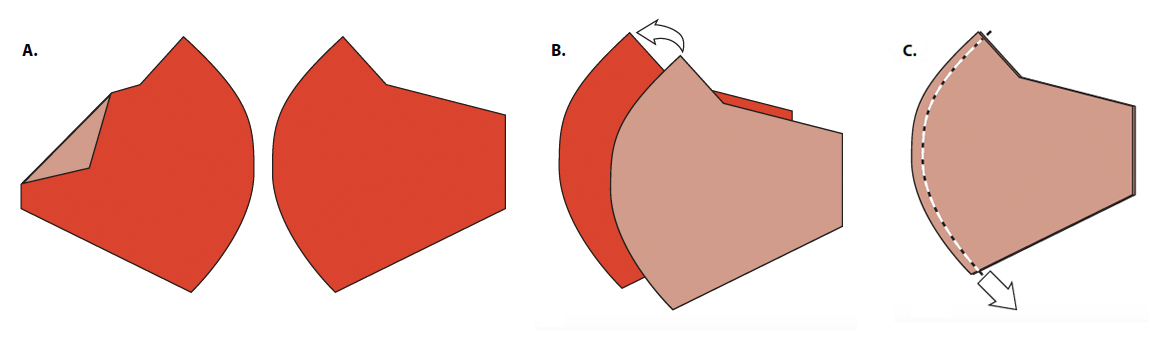
Step 1 - Continued
Place the two pieces of the exterior, woven fabric right sides together. Sew the curved edge that forms the nose to chin part of the mask with a 1/4” seam.
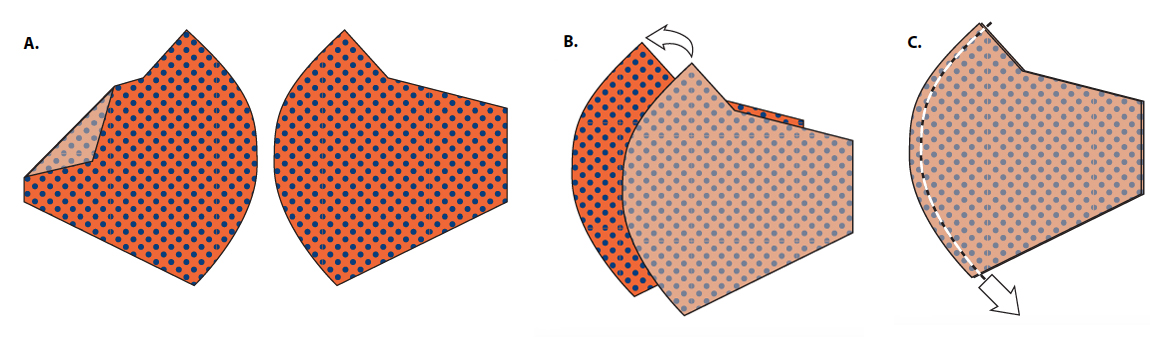
Step 2
Place the right sides of the interior knit fabric together and sew the curved part that forms the nose to chin part of the mask with a 1/4" seam.
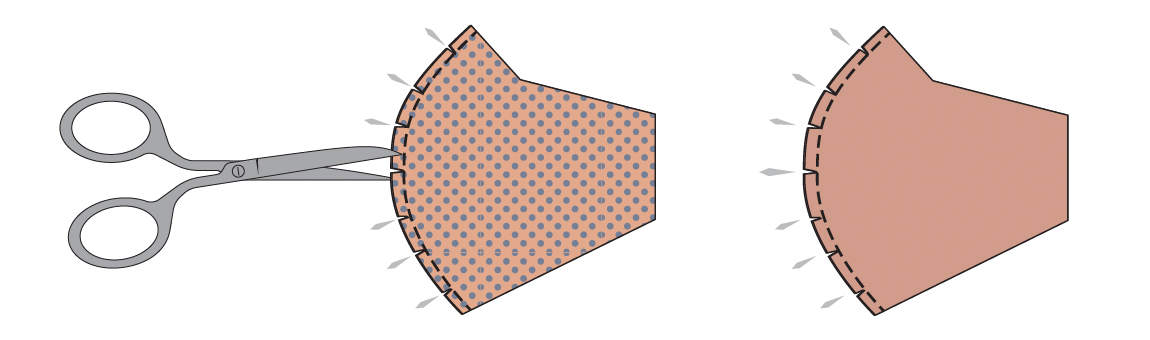
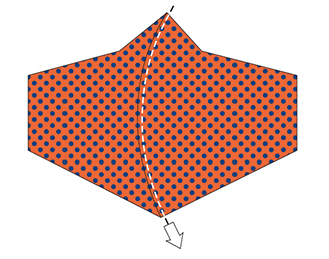
Step 3
Using sharp scissors, cut a notch by snipping the fabric outside of the curved seam on both the interior and exterior pieces about 7 times so they will flex when turned right side out.
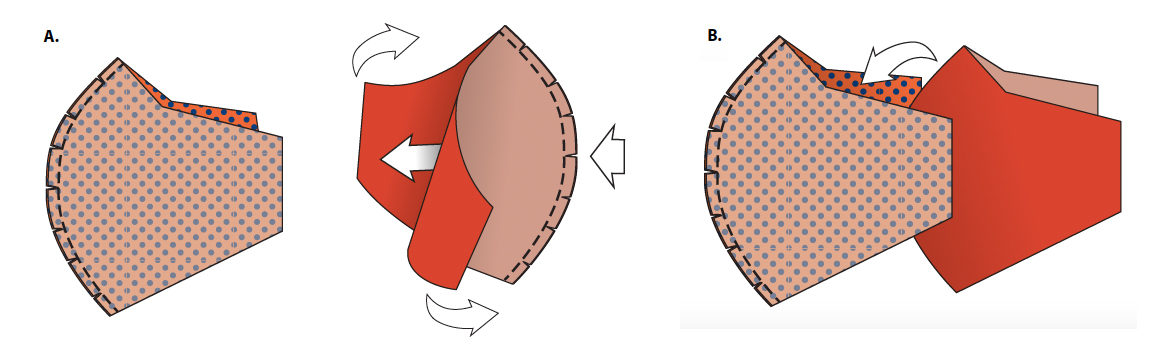
Step 4
Place the interior and exterior pieces right sides together, lining them up at the center seams on each. You can pin if you want, or just hold the two pieces together as you sew.
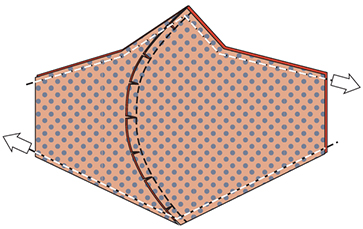
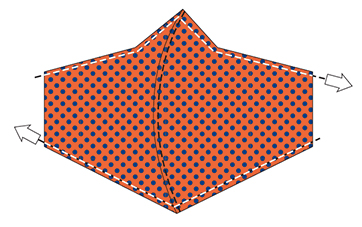
Step 5
Sew the upper and the lower parts of the mask with a 1/4" seam, holding or pinning the fabric so that the centers line up at the nose and chin.
Step 6
Turn the mask right side out and smooth it flat.
Step 7
Stitch down the front of the mask about 1/8” to the side of the center seam. Do this with the exterior fabric on top.
Step 8
Sew across the top and bottom about 1/8” away from the edge.
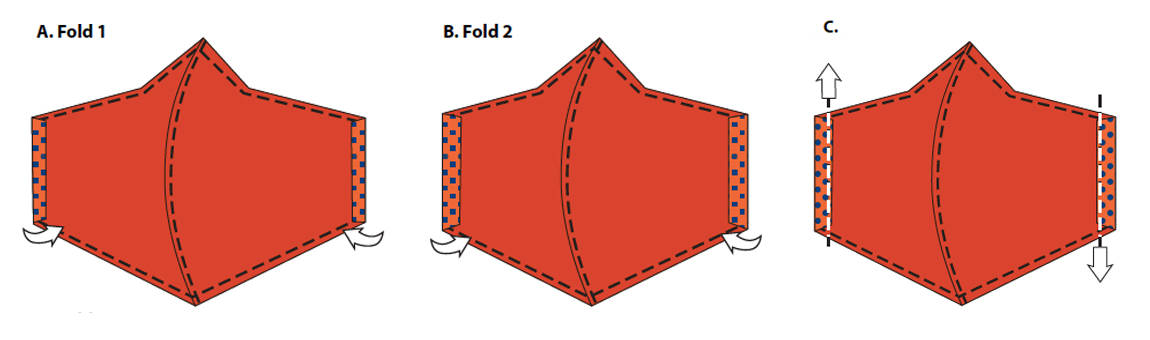
Step 9
To make the sleeves for the ties to go in, fold each side over twice, about 1/4" the first time and a bit more the second time. Sew this sleeve down on both sides of the mask about 1/8" away from the edge.
Step 10
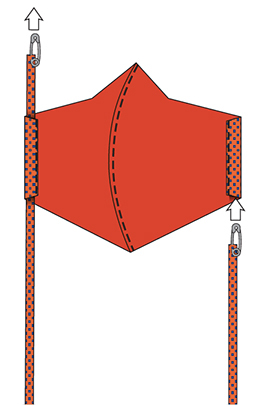
For the ties: Take a 1.5” x 30” piece of the exterior, woven fabric and fold it into a long tie for each side of the mask. Fold each side to the middle, then fold again in half. Sew the four layers together along the length of the tie. Repeat this for the second tie.

Step 11
Using a safety pin, thread each tie through the sleeves on the mask and trim ALL loose threads. You don’t want any itchy threads poking out.
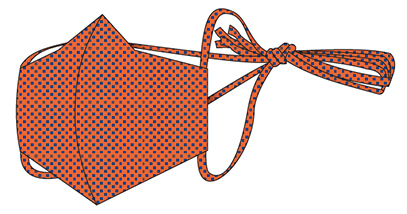
Step 12
After sewing: Take the four tie ends and secure them with a loose slip knot so that they do not tangle up in the washing machine.
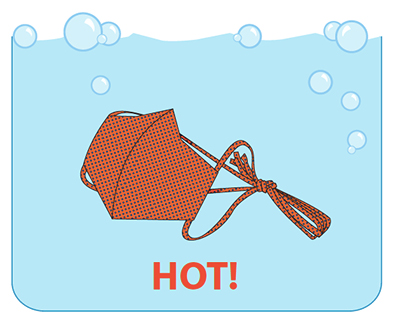
Step 13
Wash all your masks with hot, soapy water prior to returning them for distribution. If you use a lingerie bag (a mesh bag with a zipper) for washing, this will reduce tangling.
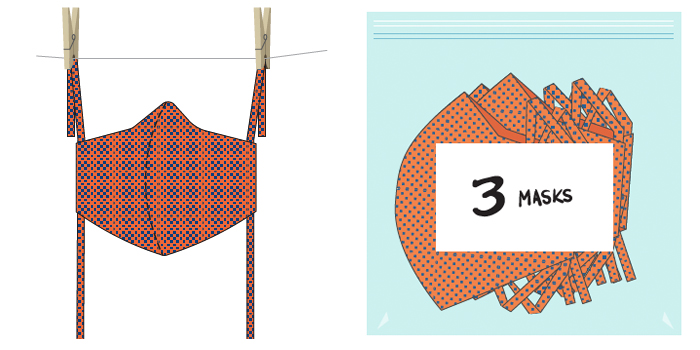
Step 14
After drying thoroughly (in a dryer or on a laundry line), place the masks in a new, clean resealable plastic bag and label the outside with the number of masks inside.
Last Updated: April 15, 2020